How to Set Up Appointment Schedules in Google Calendar (Free Booking Page)
A free personal Google account can publish one booking page with appointment schedules. Step-by-step setup, sharing and embedding, what bookers see, and the limits to plan for.
You want clients, candidates, or students to book time with you without a week of back-and-forth email. Before paying for a scheduling tool, try the one already built into Google Calendar: appointment schedules.
The short answer: with appointment schedules, even a free personal Google account can publish one booking page. You share the link, the other person picks an open time, and the booking lands on your Google Calendar as an event.
This guide walks through the setup on a computer, what the person booking sees, and what to watch for once bookings start coming in. If you mainly want to know what the free version leaves out, see Are Google Calendar appointment schedules free for personal accounts?
Before you start
According to Google’s help article Create an appointment schedule, you need:
- A personal Google Account or a Google Workspace account
- A computer with a supported web browser
You can’t create appointment schedules in the Google Calendar app for Android or iPhone and iPad. Setup and editing happen in a desktop browser.
For work or school accounts, your administrator controls whether the feature is available. Workspace Frontline, Essentials, and older Workspace plans that are no longer sold can’t create appointment schedules at all (Compare premium features for appointment schedules).
How to set up an appointment schedule on a computer
The labels below match Google’s help articles as of September 2026. Google changes its interface from time to time, so check the current help article if something looks different.
Step 1: Choose “Appointment schedule” from Create
- Open Google Calendar on a computer
- At the top left, click Create
- Select Appointment schedule
A “Bookable appointment schedule” panel opens on the left. You fill in the appointment settings here, then click Next.
Start with Add title. Anyone with the link to your booking page can see the title, so use something the other person will recognize, like “Intro call (30 min)” or “Office hours.”
Step 2: Set the appointment duration and general availability
- Appointment duration: Pick 30 minutes, 1 hour, and so on, or choose Custom for any length
- General availability: Set the days, times, and time zone you accept bookings, as a weekly pattern such as Monday to Friday, 9:00 AM to 5:00 PM
Next to each day you can choose Unavailable all day, Add another period to this day (for example, to split mornings and afternoons around lunch), or Copy time to all.
Step 3: Set the scheduling window and adjusted availability
- Scheduling window: Limit how far in advance people can book, and how much lead time you need. For example, “no same-day bookings” and “up to 60 days out”
- Adjusted availability: Change your availability for specific dates, like holidays or PTO. Click Change a date’s availability, pick a date, and select Unavailable all day (Update your availability for appointments)
Step 4: Review booked appointment settings and calendars
Under Booked appointment settings, you decide how bookings behave on your calendar:
- Buffer time: Adds time between appointments, for notes or a short break
- Maximum bookings per day: Caps how many appointments you accept in a single day
- Guest permissions: Lets guests invite other people to the appointment
Under Calendars, choose the calendar that bookings go to. Select Check calendars for availability so that times marked busy on that calendar don’t appear on the booking page. Checking other calendars, such as a personal one, requires a paid plan (more on that below).
Step 5: Set up the booking page
Click Next to move to the booking page settings.
- Booking page photo and name: Shows how you appear on the page. To change the photo or name, update your Google Account’s personal info
- Location and conferencing: Under Select how and where to meet, choose Google Meet video conferencing, an in-person meeting, a phone call, or None / to be specified later. For Zoom or another service, pick the last option and add the link to the event after someone books
- Description: Explain what the appointment is for. The description appears on the booking page, in confirmation emails, and in the event description, so it’s a good place for what to prepare and how to reschedule
- Booking form: First name, last name, and email address are required. Click Add an item to ask for things like company name or the topic
Step 6: Save and share your booking page
Click Save, and your appointment schedule is live. Google’s help article Share your appointment schedule covers each option:
- Send the link: On the left, under “Booking pages,” hover over the page and click Copy link. Paste it into an email or chat
- Add a button to your website: Open Options > Sharing options > Website embed, choose Button with popup, set the button text and color, click Copy code, and paste it into your site’s HTML
- Embed the booking page: In the same dialog, choose Inline booking page to show the page itself inside your site
Your booking page is always public. Anyone with the link can see the booking page, your profile photo, and your account name.
What the person booking sees, and what happens next
When someone opens your link, the booking page lists open dates and times. They pick a time, fill in the booking form with their name and email address, and the appointment is booked. They don’t need a Google account to do this.
The booking is added to your Google Calendar as an event, and that time disappears from the booking page. Each time on the page can be booked only once (Check your availability across calendars).
What the free version includes, and what paid plans add
Based on Google’s premium features comparison as of September 2026:
| Feature | Free personal account | Eligible paid plans |
|---|---|---|
| Booking pages | One | More than one |
| Duration, availability, buffer time, daily maximum | Included | Included |
| Booking form and Google Meet | Included | Included |
| Automatic email reminders | Not included | Included |
| Availability across multiple calendars | Not included | Included |
| Payments and email verification | Not included | Workspace Individual and up, among others |
| Up to 20 co-hosts | Not included | Business Standard and up, among others |
Eligible plans include Google One Premium, Google AI Pro and Ultra, Google Workspace Individual, and Business Standard or higher, but each feature has its own list. Check Google’s table for the exact plan you have. For a closer look at the free tier, see Are Google Calendar appointment schedules free for personal accounts?
If you only offer one kind of appointment, the free version is enough. You can have a working booking page today without signing up for anything.
Things to watch once you’re taking bookings
Other calendars don’t count on the free version
On a free account, availability only comes from the calendar that receives the bookings. Events on your personal calendar, or on a calendar in another Google account, are ignored, and those times still show as open.
Paid plans let you include calendars you own, manage, or subscribe to in the availability check. On the free version, the workaround is to add matching “busy” events to the booking calendar yourself. The trade-offs are covered in How to Prevent Double Booking Across Multiple Google Calendars.
Holidays aren’t blocked automatically
General availability is based on days of the week, so public holidays stay bookable. For a few dates, use adjusted availability to mark each one unavailable. To block a whole year of holidays at once, see How to Exclude Public Holidays from Google Calendar Appointment Schedules.
Group bookings need an eligible plan
If two people need to be free for the same appointment, Google Calendar uses co-hosts. Adding up to 20 co-hosts is a Business Standard and higher feature, so it isn’t available on free personal accounts. Also, appointment schedules don’t check co-hosts’ availability by default. You need to include their calendars in the availability check.
Reminders aren’t sent automatically on the free version
Automatic reminder emails (up to five per appointment) are a paid feature. On the free version, put the key details in the description, since it also appears in the confirmation email.
When appointment schedules stop being enough
Appointment schedules get harder to run when:
- Availability has to cover several Google accounts, such as work and personal
- Your company calendar is in Outlook (Microsoft 365) and must be respected too
- You need separate booking pages for different kinds of meetings
- Some people would rather get candidate times in an email than a booking link
Chronock is an integrated calendar with scheduling and automatic event copying built in. Its booking pages check every connected calendar and show only times that are free on all of them. You can connect several Google accounts and a Microsoft 365 Outlook calendar at the same time.
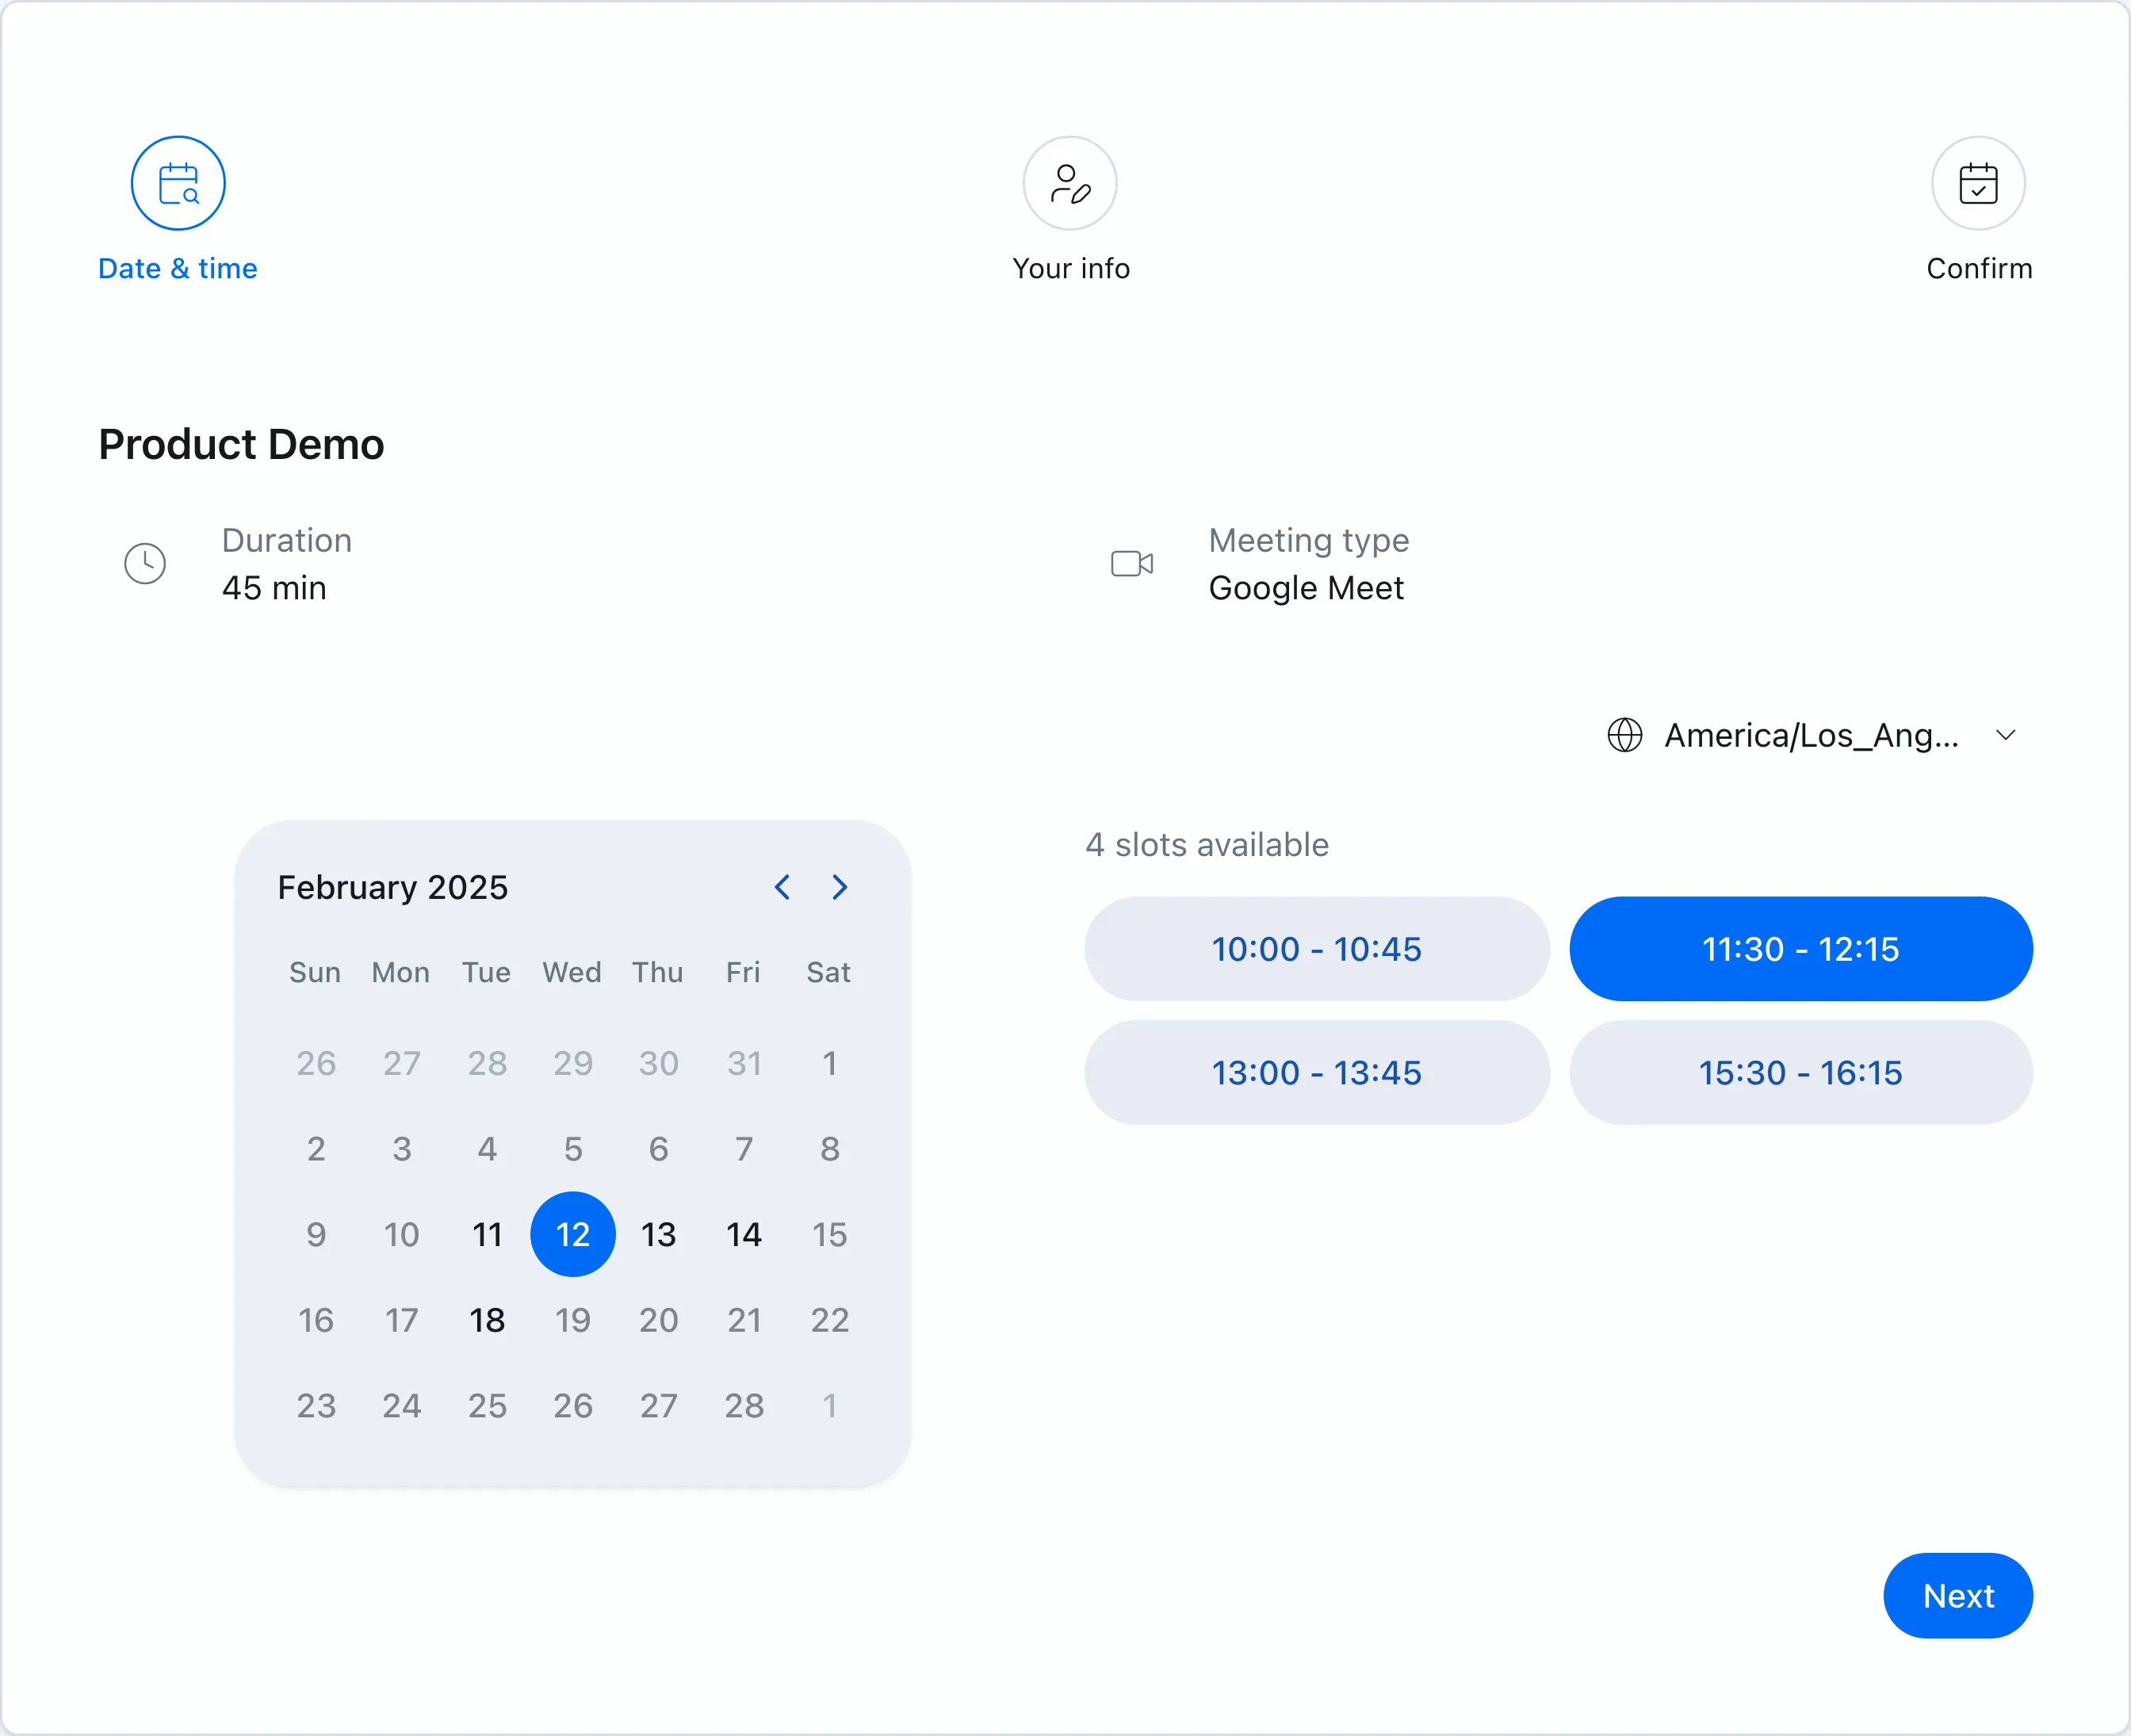 What the person booking sees. Only times that are free on every connected calendar are offered.
Booking slot settings
In Chronock, each bookable meeting type is a “slot.” Each slot has its own settings:
- Duration, time windows for each day, and pre- and post-booking buffers
- Booking cutoff and how many days ahead to offer
- Bookings per day
- Meeting tool (Google Meet or Zoom)
- Booking form fields
The booking page is available in six languages. From the same slot, Find candidate dates turns your open times into text you can paste into an email. See How to Share Available Times Instead of Sending a Scheduling URL.
You can also create several slots for different purposes and group them into rooms.
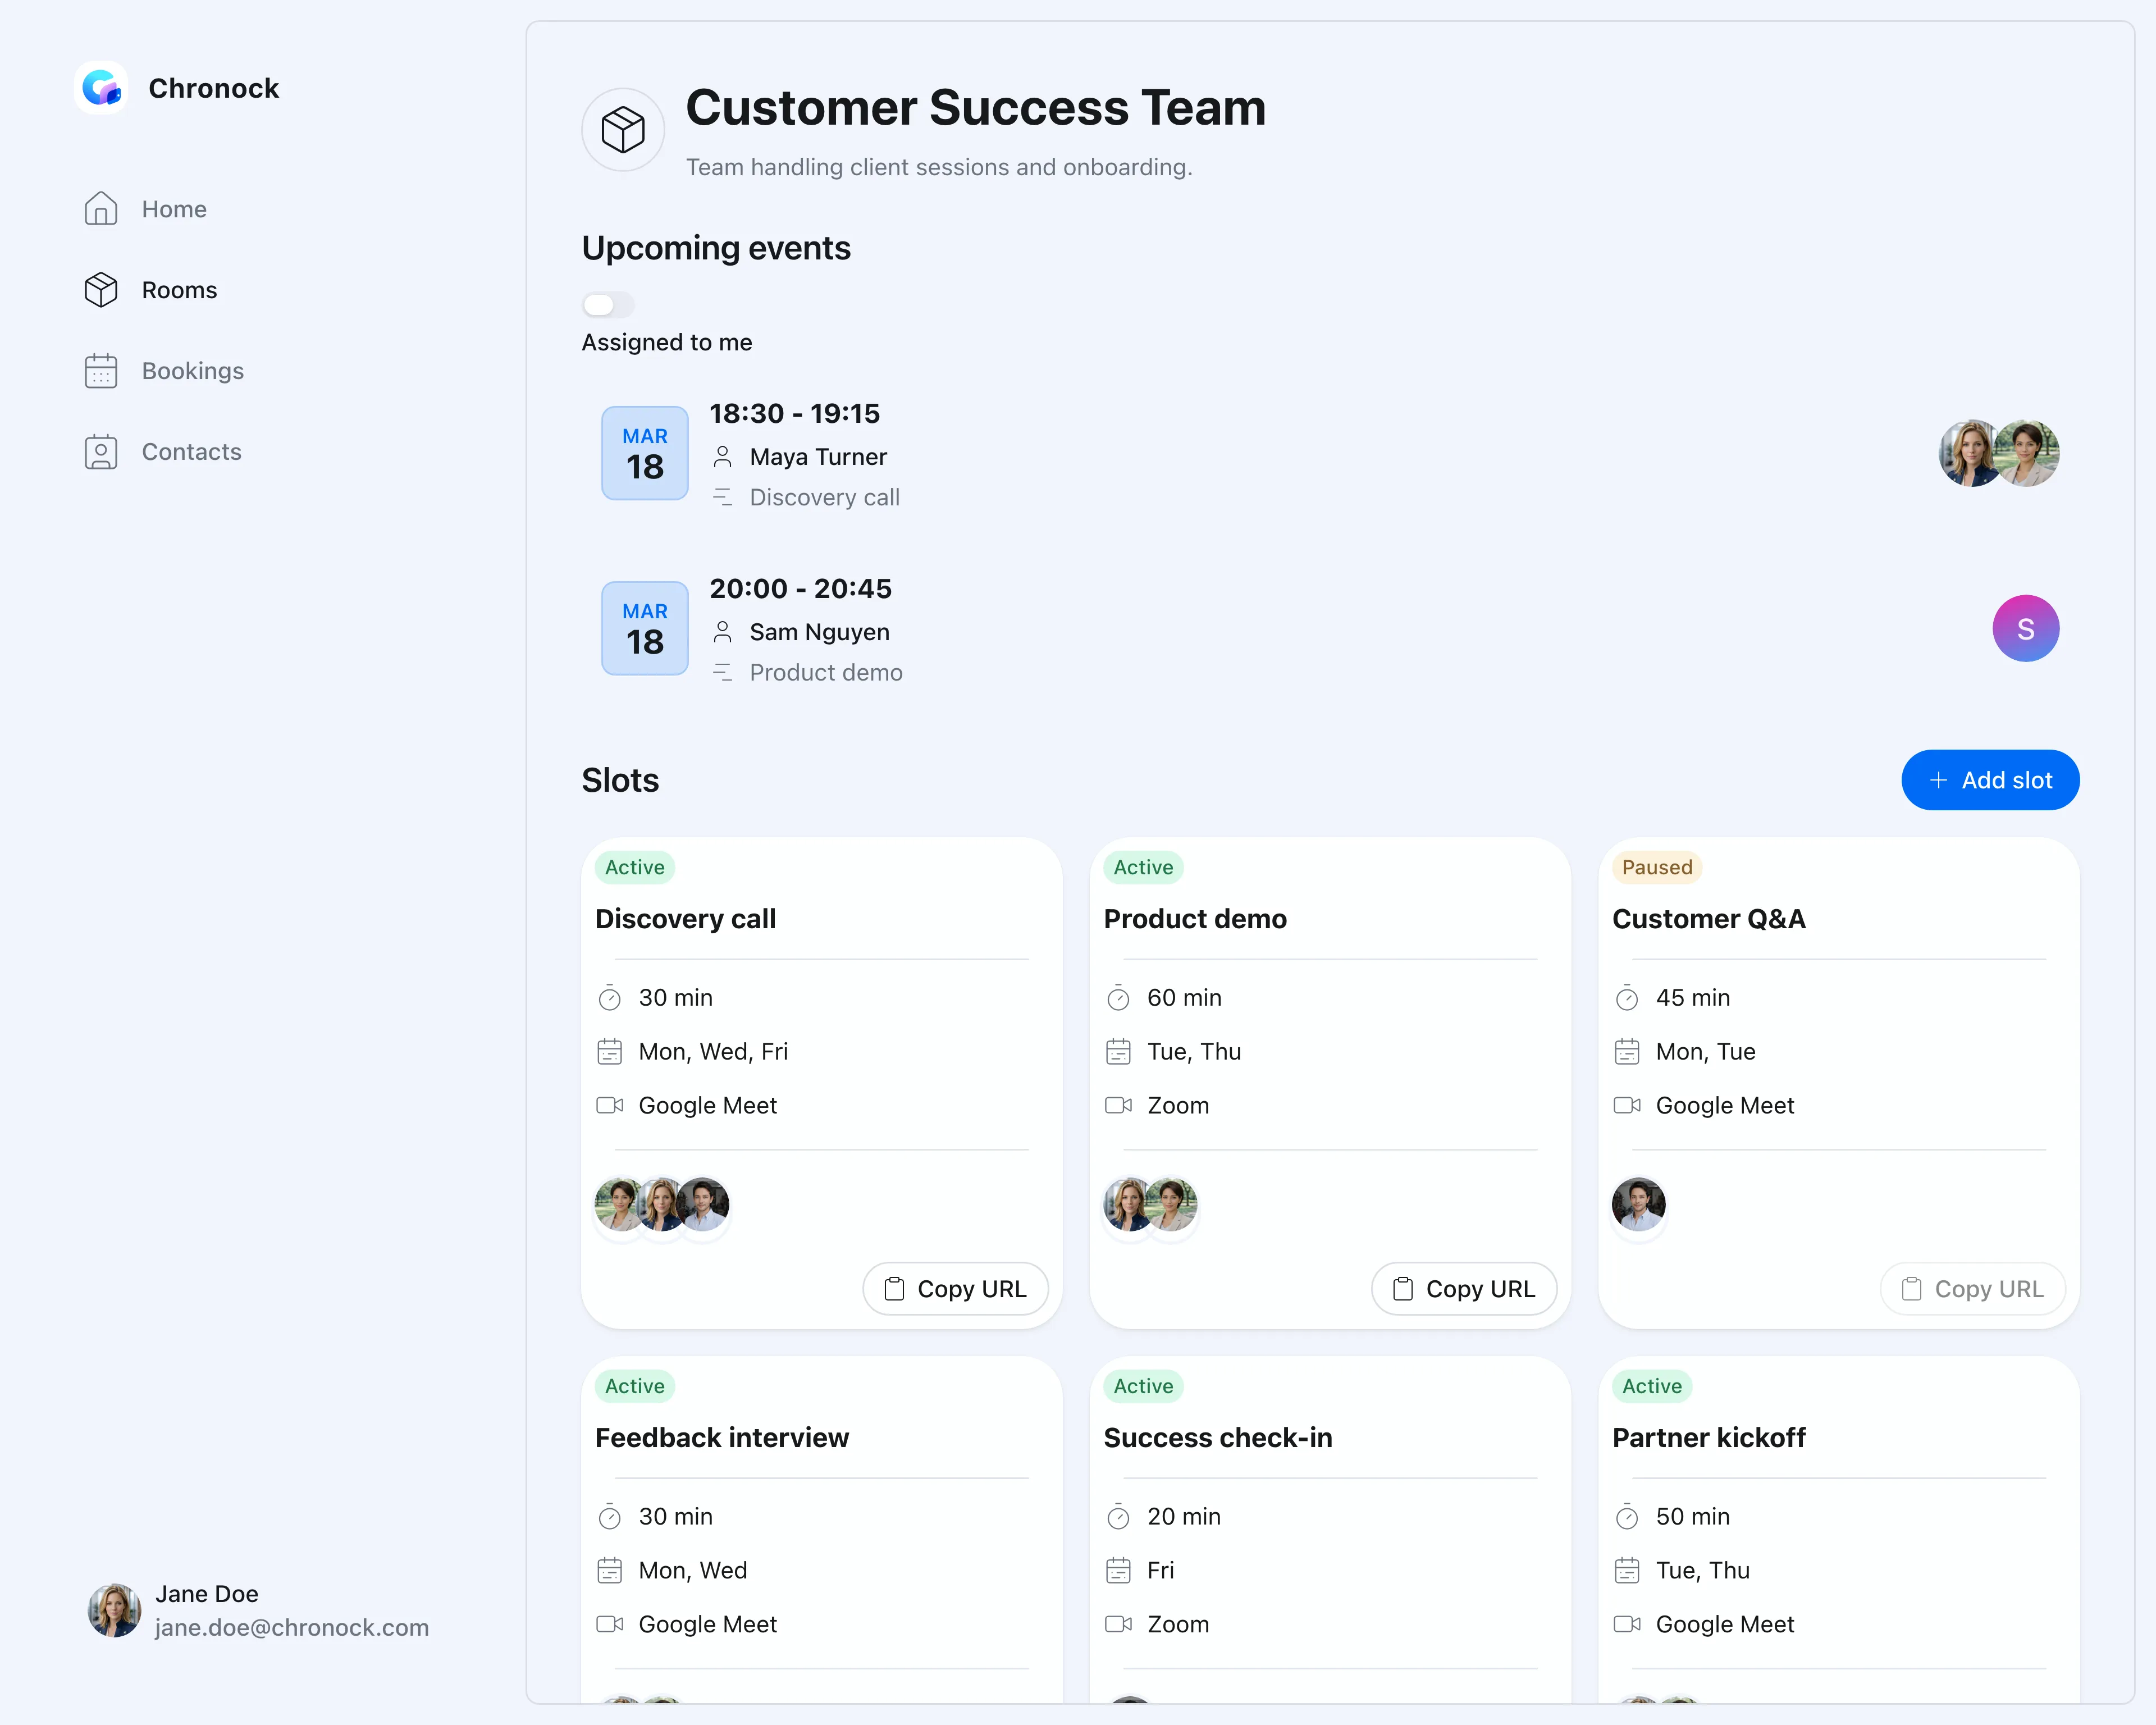 Slots grouped in a room. Multiple slots and rooms are part of the Pro plan.
What the Free plan includes
- One active booking slot, with a booking page you can share
- Up to 2 calendar connections across Google and Outlook, with availability checked across both
- One one-way, busy-only sync rule, for example copying personal events onto your work calendar as “Busy”
Google Calendar’s free version can’t include other calendars in availability. Chronock’s Free plan can check both a work and a personal calendar before offering a time.
The Pro plan is $9/user/month or $80/year. It adds unlimited slots and calendar connections, group scheduling, holds on candidate times, and a CRM for bookings and contacts. Pro comes with a 7-day free trial.
Your events still live in Google Calendar and Outlook. Chronock doesn’t replace either one. It sits on top of them and handles booking pages and your combined calendar view. For a feature-by-feature comparison, see Compare Google Calendar appointment schedules and Chronock scheduling links.
If you connect a work account, your admin may need to allow third-party apps. Outlook support covers Microsoft 365 work or school accounts. Personal Microsoft accounts such as Outlook.com aren’t supported.
Which option should you choose?
| Situation | Best fit |
|---|---|
| You offer one kind of appointment and want it free | Google Calendar appointment schedules |
| You want the booking page on your website | Google Calendar appointment schedules (button or inline embed) |
| Only the booking calendar needs to be checked | Google Calendar appointment schedules |
| Work and personal calendars both need to be checked, at no cost | Chronock Free |
| Your company uses Outlook and your personal calendar is Google | Chronock Free (up to 2 connections) |
| You need separate booking pages per meeting type | An eligible Google plan, or Chronock Pro |
| You want to send candidate times in an email | Chronock’s candidate dates tool |
Start by building one booking page with Google Calendar appointment schedules and taking a few real bookings. If conflicts with other calendars or the need for separate links show up, that’s the point to look at other options.